Tools
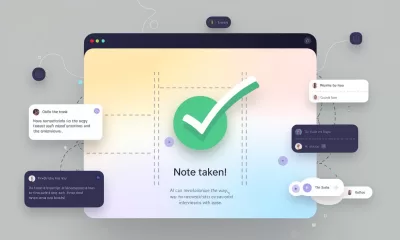
Fine-Tuning GPT-4o for Revolutionary Performance
Fine-tuning GPT-4o offers developers the ability to customise AI models for specific tasks, enhancing performance and accuracy.

TL;DR:
- Fine-tuning GPT-4o allows developers to customise AI models for specific tasks, enhancing performance and accuracy.
- Cosine’s Genie achieved a state-of-the-art score of 43.8% on the SWE-bench Verified benchmark using fine-tuned GPT-4o.
- Distyl ranked 1st on the BIRD-SQL benchmark with a 71.83% execution accuracy using fine-tuned GPT-4o.
In the rapidly evolving world of artificial intelligence (AI), the ability to fine-tune models has become a game-changer. Today, we’re thrilled to announce the launch of fine-tuning for GPT-4o, a feature that developers have been eagerly awaiting. This new capability allows developers to customise GPT-4o models with their own datasets, leading to higher performance and lower costs for specific use cases. Let’s dive into what this means for the future of AI in Asia and beyond.
What is Fine-Tuning and Why Does It Matter?
Fine-tuning is the process of training a pre-trained AI model on a new dataset to adapt it to a specific task. For GPT-4o, this means developers can now tailor the model to their unique needs, whether it’s coding, creative writing, or any other domain-specific application. This customisation can significantly improve the model’s performance and accuracy, making it more efficient and cost-effective.
Getting Started with GPT-4o Fine-Tuning
To start fine-tuning GPT-4o, developers can visit the fine-tuning dashboard and select the base model they want to customise. GPT-4o fine-tuning is available to all developers on paid usage tiers, with costs starting at $25 per million tokens for training and $3.75 per million input tokens for inference.
For those looking to experiment without a significant investment, GPT-4o mini fine-tuning is also available. This version offers 2 million training tokens per day for free until September 23, making it an excellent starting point for developers to test the waters.
Achieving State-of-the-Art Performance
Over the past few months, we’ve collaborated with trusted partners to test fine-tuning on GPT-4o. The results have been impressive. Here are a couple of success stories:
Cosine’s Genie: A Software Engineering Marvel
Cosine’s Genie is an AI software engineering assistant that can autonomously identify and resolve bugs, build features, and refactor code. Powered by a fine-tuned GPT-4o model, Genie has achieved a state-of-the-art score of 43.8% on the new SWE-bench Verified benchmark. This is a significant improvement over previous models, demonstrating the power of fine-tuning.
“Genie is powered by a fine-tuned GPT-4o model trained on examples of real software engineers at work, enabling the model to learn to respond in a specific way.”
- Cosine
Distyl: Leading the Way in Text-to-SQL
Distyl, an AI solutions partner to Fortune 500 companies, recently placed 1st on the BIRD-SQL benchmark. Their fine-tuned GPT-4o model achieved an execution accuracy of 71.83%, excelling in tasks like query reformulation, intent classification, and SQL generation. This achievement highlights the versatility and effectiveness of fine-tuned models.
Ensuring Data Privacy and Safety
Fine-tuned models remain entirely under the control of the developers, ensuring full ownership of business data, including all inputs and outputs. This means your data is never shared or used to train other models. Additionally, we’ve implemented layered safety mitigations to prevent misuse of fine-tuned models. Automated safety evaluations and usage monitoring ensure that applications adhere to our usage policies.
Prompt: Customising GPT-4o for Your Needs
Before diving into fine-tuning, it’s crucial to understand the specific needs of your application. Here’s a prompt to help you get started:
“Imagine you are a developer working on a project that requires high accuracy in text-to-SQL conversion. How would you fine-tune GPT-4o to achieve the best results for this specific task?”
This prompt encourages you to think about the unique requirements of your project and how fine-tuning can help you achieve your goals. By customising GPT-4o, you can create a model that is tailored to your specific needs, leading to better performance and efficiency.
Comment and Share:
We’d love to hear your thoughts on fine-tuning GPT-4o and how it’s transforming the AI landscape. Share your experiences and insights in the comments below. Don’t forget to subscribe for updates on AI and AGI developments.
You may also like:
- Get Access to OpenAI’s New GPT-4o Now!
- 10 Amazing GPT-4o Use Cases
- 7 GPT-4o Prompts That Will Blow Your Mind!
- To learn more about fine tuning ChatGPT tap here.
Author
Discover more from AIinASIA
Subscribe to get the latest posts sent to your email.


Life
How To Teach ChatGPT Your Writing Style
This warm, practical guide explores how professionals can shape ChatGPT’s tone to match their own writing style. From defining your voice to smart prompting and memory settings, it offers a step-by-step approach to turning ChatGPT into a savvy writing partner.

TL;DR — What You Need To Know
- ChatGPT can mimic your writing tone with the right examples and prompts
- Start by defining your personal style, then share it clearly with the AI
- Use smart prompting, not vague requests, to shape tone and rhythm
- Custom instructions and memory settings help ChatGPT “remember” you
- It won’t be perfect — but it can become a valuable creative sidekick.
Start by defining your voice
Before ChatGPT can write like you, you need to know how you write. This may sound obvious, but most professionals haven’t clearly articulated their voice. They just write.
Think about your usual tone. Are you friendly, brisk, poetic, slightly sarcastic? Do you use short, direct sentences or long ones filled with metaphors? Swear words? Emojis? Do you write like you talk?
Collect a few of your own writing samples: a newsletter intro, a social media post, even a Slack message. Read them aloud. What patterns emerge? Look at rhythm, vocabulary and mood. That’s your signature.
Show ChatGPT your writing
Now you’ve defined your style, show ChatGPT what it looks like. You don’t need to upload a manifesto. Just say something like:
“Here are three examples of my writing. Please analyse my tone, sentence structure and word choice. I’d like you to write like this moving forward.”
Then paste your samples. Follow up with:
“Can you describe my writing style in a few bullet points?”
You’re not just being polite. This step ensures you’re aligned. It also helps ChatGPT to frame your voice accurately before trying to imitate it.
Be sure to offer varied, representative examples. The more you reflect your daily writing habits across different formats (emails, captions, articles), the sharper the mimicry.
Prompt with purpose
Once ChatGPT knows how you write, the next step is prompting. And this is where most people stumble. Saying, “Make it sound like me” isn’t quite enough.
Instead, try:
“Rewrite this in my tone — warm, conversational, and a little cheeky.” “Avoid sounding corporate. Use contractions, variety in sentence length and clear rhythm.”
Yes, you may need a few back-and-forths. But treat it like any editorial collaboration — the more you guide it, the better the results.
And once a prompt nails your style? Save it. That one sentence could be reused dozens of times across projects.
Use memory and custom instructions
ChatGPT now lets you store tone and preferences in memory. It’s like briefing a new hire once, rather than every single time.
Start with Custom Instructions (in Settings > Personalisation). Here, you can write:
“I use conversational English with dry humour and avoid corporate jargon. Short, varied sentences. Occasionally cheeky.”
Once saved, these tone preferences apply by default.
There’s also memory, where ChatGPT remembers facts and stylistic traits across chats. Paid users have access to broader, more persistent memory. Free users get a lighter version but still benefit.
Just say:
“Please remember that I like a formal tone with occasional wit.”
ChatGPT will confirm and update accordingly. You can always check what it remembers under Settings > Personalisation > Memory.
Test, tweak and give feedback
Don’t be shy. If something sounds off, say so.
“This is too wordy. Try a punchier version.” “Tone down the enthusiasm — make it sound more reflective.”
Ask ChatGPT why it wrote something a certain way. Often, the explanation will give you insight into how it interpreted your tone, and let you correct misunderstandings.
As you iterate, this feedback loop will sharpen your AI writing partner’s instincts.
Use ChatGPT as a creative partner, not a clone
This isn’t about outsourcing your entire writing voice. AI is a tool — not a ghostwriter. It can help organise your thoughts, start a draft or nudge you past a creative block. But your personality still counts.
Some people want their AI to mimic them exactly. Others just want help brainstorming or structure. Both are fine.
The key? Don’t expect perfection. Think of ChatGPT as a very keen intern with potential. With the right brief and enough examples, it can be brilliant.
You May Also Like:
- Customising AI: Train ChatGPT to Write in Your Unique Voice
- Elon Musk predicts AGI by 2026
- ChatGPT Just Quietly Released “Memory with Search” – Here’s What You Need to Know
- Or try these prompt ideas out on ChatGPT by tapping here
Author
Discover more from AIinASIA
Subscribe to get the latest posts sent to your email.
Tools
Upgrade Your ChatGPT Game With These 5 Prompts Tips
Most people ask ChatGPT the wrong way. These 5 prompt upgrades will train the AI to think sharper and deliver smarter answers every time.

What if the problem isn’t ChatGPT — but how you’re talking to it? As businesses across Asia scramble to integrate AI into daily workflows, far too many professionals are getting half-baked answers and wasting time refining prompts. Precision equals clarity. And clarity starts with knowing what to ask. Read on for 5 elite ChatGPT prompt tips.
TL;DR — What You Need To Know
- ChatGPT often gives vague or flawed answers because the prompt lacks structure
- Adding 5 targeted follow-up requests can dramatically improve output quality
- Smart prompting forces the AI to self-check, ask better questions, and aim higher
- These techniques turn ChatGPT into a sharper thinking partner for professionals
1. Make ChatGPT Score Its Own Work
Like a student handing in homework and marking their own essay, ChatGPT performs better when it’s made to judge itself. Give it a red pen:
“I want you to assess your response against this checklist. Rate your answer on a scale of 1-10 for each of these criteria: accuracy, completeness, relevance, clarity, and practical usefulness…”
By forcing the AI to reflect on its own output, you raise the baseline for what counts as “done.” You get more precise responses — and fewer excuses to settle for less.
2. Demand Reasoning, Not Just Answers
Don’t let ChatGPT blag its way through your questions like a first-year intern. Make it show its working — maths teacher-style.
“For each main point in your response, explain your reasoning process…”
This single move helps you spot weak assumptions and gives you greater confidence in the result. Especially important when decisions — or reputations — are on the line.
3. Make It Ask the Right Questions First
If your prompt sounds like a half-baked WhatsApp message at 2am, don’t expect brilliance. Before ChatGPT replies, let it play detective.
“Before giving me any answer, point out exactly what I’ve left out of my request…”
It’s the kind of intelligent friction that turns vague ideas into actionable prompts. Think of it as ChatGPT playing devil’s advocate before it turns into your co-pilot.
4. Find Your Blind Spots Early
Even the best minds occasionally forget the obvious. Enter ChatGPT, your AI-powered Socrates, asking the awkward questions others won’t.
“Review my request and tell me what angles I’m completely missing…”
This elevates the conversation. ChatGPT stops being a yes-man and starts acting like the curious challenger every business leader needs.
5. Push It to Think Like an Expert
You wouldn’t ask a junior exec to run your quarterly strategy — so don’t let ChatGPT deliver B-grade insights. Demand elite thinking.
“Respond to my question as if you were in the top 1% of experts in my field…”
This unlocks deeper insights, smarter trade-offs, and far more useful recommendations — especially when your questions relate to strategy, branding, or customer psychology.
Get Better Answers From ChatGPT Every Time
The best ChatGPT users aren’t the ones with the fanciest tools. They’re the ones who ask better questions. Use these five prompt upgrades as your new default. Over time, the difference isn’t just better responses — it’s better thinking.
Share YOUR ChatGPT prompt tips!
Do your ChatGPT answers leave you with digital drivel? Share your own tips and tricks in the comments below!
You may also like:
- 7 Effective AI Prompt Strategies to Elevate Your Results Instantly
- Game-Changing Google Gemini Tips for Tech-Savvy Asians
- Or tap here to try these ChatGPT prompt tips now
Author
Discover more from AIinASIA
Subscribe to get the latest posts sent to your email.
Learning
Build Your Own Custom GPT in Under 30 Minutes – Step-by-Step Beginner’s Guide
Create your own GPT without writing code. This beginner-friendly guide shows you how to build, customise, and publish a ChatGPT assistant using OpenAI’s builder — complete with personality, knowledge, and tools.

A friendly guide to building your personalised ChatGPT assistant (custom GPT creation) in under 30 minutes
The Quick Essentials
Before we dive in, here’s what you need to know:
- You’ll need a ChatGPT Plus or Enterprise account (the paid version)
- Creating a custom GPT involves naming it, giving it a personality, uploading knowledge files, and enabling tools
- The entire process happens at chat.openai.com/gpts
- No coding required — just plain English instructions
- You can keep your GPT private, share it via link, or publish it in the GPT Store
Step 1: Getting Access
First things first, you need a ChatGPT Plus subscription:
- Head over to chat.openai.com
- Click “Upgrade to Plus” if you haven’t subscribed yet
- Confirm your plan and payment (USD $20/month at the time of writing)
Once you’re all subscribed:
- Navigate to: chat.openai.com/gpts
- Click the black “Explore GPTs” button in the left menu
- At the top right, click “Create”

Brilliant! You’re now in the GPT Builder interface where all the magic happens.
Step 2: Starting in “Create” Mode
You’ll see a chat interface asking: “What would you like to make?”
This is where you describe your GPT in plain language. For example:
“I’d like to create a friendly GPT that helps junior marketers in the UK write social media copy. It should use casual British English and understand cultural references from across the UK.”

The system will respond with follow-up questions like:
- What tone should it use?
- Should it browse the internet or run code?
- Will you upload any knowledge files?
Answer naturally and conversationally. The system builds a draft GPT based on your answers.

It may even recommend a name and an image:

Once the chat version feels roughly right, click “Configure” in the top bar to manually fine-tune everything.

Step 3: Configuring Your GPT
This is the control panel where you can edit every setting. Follow these steps:
3.1 — Name Your GPT
- In the Name field: give it a clear name like “Brit Copy Buddy”
- In Description: write what it does — “Helps junior UK marketers write scroll-stopping social copy in casual British English.”
3.2 — Write the Instructions
Scroll down to the Instructions box and type your behaviour settings. Think of this like a personality manual. If you followed the steps, then it may well already be filled in for you. This is where the magic happens, so make sure it truly reflects your purpose. Because it is so important, we created a separate guide for this which you can read here. For example:
This GPT is a friendly and culturally aware assistant designed to help junior marketers in the UK write engaging social media copy. It communicates in a casual, approachable tone using British English, including regionally familiar slang and references from across England, Scotland, Wales, and Northern Ireland. It provides clear, supportive guidance to help users improve their writing, offering creative suggestions while keeping brand voice and audience in mind. It can reference UK cultural events, holidays, humour, and idioms to make content feel local and relevant. It avoids Americanisms and ensures that grammar, spelling, and phrasing are aligned with UK standards. The assistant will ask for context when needed (e.g., target audience or platform), and will aim to keep things breezy, witty, and scroll-stopping.
3.3 — Add Conversation Starters
Under Conversation Starters, add 3–4 useful prompts users might click on:
- “Help me write a tweet for a UK skincare brand launch”
- “Can you make this Instagram caption sound more British?”
- “Draft some TikTok captions about a new meal deal”
This helps users jump straight in without typing from scratch.

Step 4: Adding Custom Knowledge (Optional but Recommended)
If you want the GPT to reference your own documents — like brand guidelines or FAQs — follow these steps:
- Scroll to the Knowledge section
- Drag and drop your files (accepted formats: .pdf, .txt, .csv, .md, .json)
- Upload limit is around 20 files at present
Example: Upload a “Tone of Voice Guide.pdf” and your GPT will use it to match your brand style.

Important note: Your GPT can reference but not quote files word-for-word. It learns the content conceptually rather than memorising exact phrases.
We have created a step-by-step guide for the best way to structure your Knowledge files here.
Step 5: Enabling Tools
Now choose which abilities your GPT should have.
Scroll to Capabilities, and toggle the following:
- ✅ Web Browsing — useful for real-time info like news or trends
- ✅ Code Interpreter — for handling files, calculations, data plots
- ✅ Image Generation — if you want it to create pictures (e.g., Instagram ideas)
- ✅ File Uploads — lets users feed the GPT spreadsheets or PDFs
Select only what’s genuinely useful — too many tools can make your GPT’s responses confusing.

Step 6: Testing Your GPT Thoroughly
Before publishing, have a proper chat with your GPT.
Ask both straightforward and unusual questions to test:
- Does it maintain the right tone?
- Does it understand your uploaded files?
- Does it use tools properly (like making charts or browsing)?
- Does it clarify things when uncertain or guess incorrectly?
If anything feels off, go back to the Instructions and tweak your wording. Even changing one line can make a significant difference.
Step 7: Create New Action
This function allows you to turn your GPT into a powerful API-aware assistant that can fetch data, trigger services, or complete tasks — all from inside the chat.
This is an optional extra when creating a Custom GPT and is complicated enough to need its own guide, which you can read here.
If this is your first attempt at creating a Custom GPT, we suggest skipping this step for now and moving on to Step 8.
Step 8: Switch Off Training
You should always consider anything sensitive you share with any AI chatbot. However, its always a good idea to switch off the request to improve the AI models.

Step 9: Publishing Your GPT
At the bottom right, click the “Publish” button.
You’ll be asked to choose:
- Private — only visible to you
- Unlisted — only people with your link can access it
- Public — listed on the GPT Store for anyone to use
Give it a thumbnail image (upload one or use the auto-generated option), choose a category (e.g., Marketing, Productivity), and confirm.

Congratulations! Your GPT is now live and you can view it.


Final Tips for Success
- 🧹 Keep it focused — One GPT = one clear purpose
- 🪪 Use your brand voice — match the tone your users expect
- 🔁 Iterate regularly — update your files and instructions as you learn what works
- 💬 Share wisely — use private/unlisted first before going public
Happy GPT creating! With these steps, you’ll be up and running with your custom assistant in no time.
You may also find useful:
- How to Upload Knowledge into Your Custom GPT
- How to Use the “Create an Action” Feature in Custom GPTs
- Or try this playbook out now at ChatGPT by tapping here.
Author
Discover more from AIinASIA
Subscribe to get the latest posts sent to your email.

How To Teach ChatGPT Your Writing Style

Upgrade Your ChatGPT Game With These 5 Prompts Tips

If AI Kills the Open Web, What’s Next?


-

 Life3 weeks ago
7 Mind-Blowing New ChatGPT Use Cases in 2025
-
Learning2 weeks ago
How to Use the “Create an Action” Feature in Custom GPTs
-
Business3 weeks ago
AI Just Killed 8 Jobs… But Created 15 New Ones Paying £100k+
-
Learning2 weeks ago
How to Upload Knowledge into Your Custom GPT
-
Learning1 week ago
Build Your Own Custom GPT in Under 30 Minutes – Step-by-Step Beginner’s Guide
-
Business2 weeks ago
Adrian’s Arena: Stop Collecting AI Tools and Start Building a Stack
-
Life3 weeks ago
Adrian’s Arena: Will AI Get You Fired? 9 Mistakes That Could Cost You Everything
-
Life4 hours ago
How To Teach ChatGPT Your Writing Style